
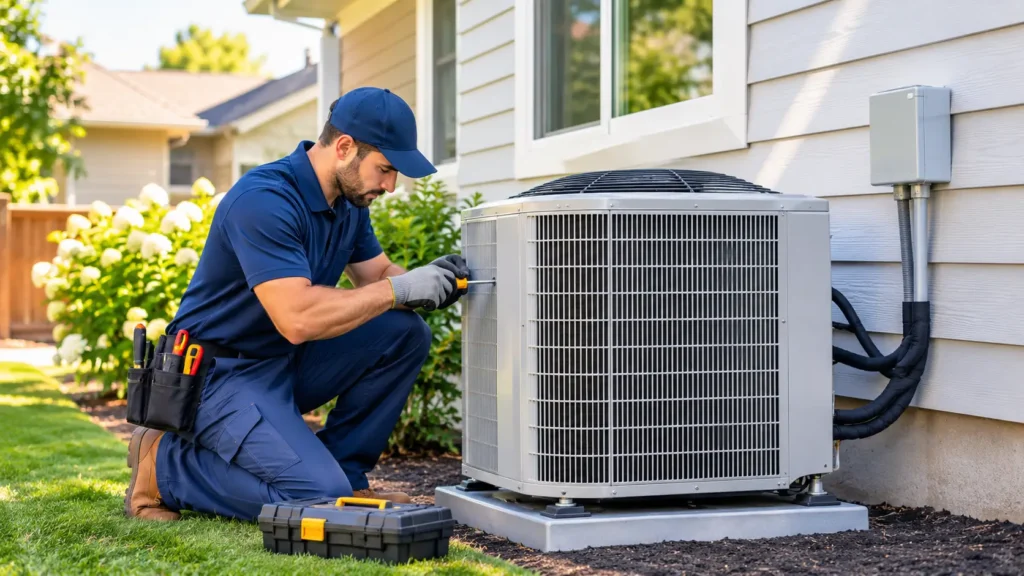
5. Introduction
Choosing an air conditioning system for your home is only half the job. The quality of the installation determines whether that system will actually deliver the comfort, efficiency, and reliability you expect. Even an expensive, high-efficiency unit can waste energy if it is incorrectly sized or poorly installed.
One of the biggest challenges homeowners face is knowing where to start. Should you choose central air conditioning or a ductless mini-split? How much cooling capacity does your home need? And what should you expect from a professional HVAC installation?
This guide explains the entire home air conditioning installation process, from choosing the right equipment and preparing your property to understanding installation costs and checking system performance. By the end, you will know what a quality installation should look like and how to avoid expensive mistakes.
6. Understanding Home Air Conditioning Installation
Home air conditioning installation involves selecting, designing, positioning, connecting, and testing an air conditioning system to provide reliable indoor cooling.
It involves more than placing an indoor unit on a wall or installing an outdoor condenser. A properly designed installation must account for the home’s cooling requirements, electrical capacity, airflow, refrigerant lines, drainage, insulation, and equipment compatibility.
The installation process depends on the type of system being used, the home’s existing infrastructure, and the building’s layout.
For example, installing a ductless mini-split in a small apartment is considerably different from installing a central air conditioning system in a two-story house with existing ductwork.
Main Types of Home Air Conditioning Systems
Before scheduling an installation, it is important to understand the available system types. Each option has different installation requirements, operating characteristics, and suitability for different homes.
1. Central Air Conditioning
Central air conditioning uses a network of ducts to distribute cooled air throughout the home.
A typical central AC system includes an outdoor condenser, an indoor evaporator coil or air handler, a blower, a thermostat, and supply and return ductwork.
Central air conditioning is particularly suitable for houses with existing ductwork and multiple rooms requiring consistent cooling.
Its main advantage is the ability to cool several rooms through one integrated system. However, installation can become expensive when new ductwork is required.
2. Ductless Mini-Split Systems
Ductless mini-split systems connect one or more indoor units to an outdoor condenser without requiring traditional air ducts.
They provide flexible temperature control for individual rooms or zones.
Mini-splits are particularly useful for:
- Apartments without existing ductwork.
- Older houses.
- Home additions.
- Converted garages.
- Individual rooms requiring independent temperature control.
One important consideration is indoor unit placement. Installing a unit where airflow is blocked by furniture or directed straight toward occupants can reduce comfort.
3. Window Air Conditioners
Window air conditioners are compact systems installed in suitable windows or specially prepared openings.
They are generally less expensive and easier to install than central systems.
However, they typically provide cooling for individual rooms rather than entire homes.
4. Portable Air Conditioners
Portable air conditioners sit inside the room and discharge hot air through an exhaust hose connected to a window kit.
They require little permanent installation, making them useful for temporary cooling or properties where permanent modifications are impractical.
However, poor window sealing can allow warm outdoor air to enter the room, reducing cooling effectiveness.
Central AC vs. Mini-Split: Which Is Better?
There is no universally best system. The right choice depends on the home’s construction, cooling requirements, existing infrastructure, and budget.
| Feature | Central AC | Mini-Split |
|---|---|---|
| Air distribution | Ductwork | Individual indoor units |
| Installation | More complex | Usually less invasive |
| Room-level control | Depends on zoning | Available with multiple zones |
| Existing ducts | Usually required | Not required |
| Best application | Whole-home cooling | Individual rooms or zones |
| Main consideration | Duct design and condition | Unit placement and zone sizing |
Consider a homeowner renovating an older property without existing ductwork. Installing central air may require extensive construction, while a ductless mini-split can provide cooling with considerably less structural modification.
However, if a house already has properly designed and sealed ductwork, central AC may be the more practical solution.
The decision should be based on the complete installation cost and expected performance, not simply the purchase price of the equipment.
7. How to Choose the Right Air Conditioner for Your Home
Selecting the right equipment is one of the most important stages of home air conditioning installation.
A common mistake is choosing an air conditioner based only on the home’s square footage. Although floor area is useful, it does not provide enough information to determine the correct cooling capacity.
Calculate the Cooling Load
Professional HVAC contractors use a process called a cooling load calculation to estimate how much heat a home gains during hot weather.
In North America, ACCA Manual J is a widely recognized methodology for residential load calculations.
The calculation considers several factors:
- Total conditioned floor area.
- Ceiling height and room volume.
- Wall and roof insulation.
- Window size, orientation, and glazing characteristics.
- Local outdoor design temperatures.
- Air leakage and ventilation.
- Number of occupants and internal heat sources.
For example, two homes with identical floor areas may require different air conditioning capacities.
A house with large south-facing windows, poor insulation, and an exposed roof may experience significantly higher cooling loads than a shaded, well-insulated property.
This is why using a simple rule such as selecting a fixed BTU capacity per square foot can lead to poor results.
Understand BTU and Cooling Capacity
BTU, or British Thermal Unit, is commonly used to describe the cooling capacity of residential air conditioners.
In many North American product specifications, cooling capacity is expressed in BTU per hour (BTU/h).
A larger number does not automatically mean better performance. The equipment must match the calculated cooling load.
An oversized system may reach the thermostat’s target temperature quickly and switch off before removing enough moisture from the indoor air. This behavior is known as short cycling.
Undersized equipment, on the other hand, may run continuously without maintaining a comfortable indoor temperature during peak heat.
Compare Energy Efficiency Ratings
Energy efficiency should be considered alongside equipment capacity.
For residential cooling systems in North America, one important rating is SEER2 (Seasonal Energy Efficiency Ratio 2).
Higher SEER2 ratings generally indicate better seasonal cooling efficiency under standardized testing conditions.
However, the most efficient equipment on paper may not be the best investment for every home.
Consider:
- Initial purchase and installation costs.
- Expected annual operating hours.
- Local electricity prices.
- Climate conditions.
- Maintenance requirements.
- Equipment warranty and availability of replacement parts.
A properly installed mid-range system may deliver better real-world results than a premium unit with poor airflow or incorrect refrigerant charging.
Check Equipment Compatibility
When replacing an existing system, do not assume that every new indoor component will work correctly with the old outdoor unit.
Central air conditioning systems often require compatible indoor coils, outdoor condensers, metering devices, and controls.
Manufacturers and industry certification programs provide equipment matching information to verify compatible combinations.
A professional contractor should confirm that the selected components form an approved and properly rated system.
8. The Home Air Conditioning Installation Process: Step by Step
A professional installation follows a sequence of technical and practical steps. Understanding these stages helps homeowners evaluate the contractor’s work and prepare for the project.
Step 1: Home Assessment and Site Inspection
Before installation begins, the contractor should inspect the property and identify any conditions that could affect system performance.
The inspection typically includes:
- Measuring the conditioned areas.
- Evaluating insulation and windows.
- Checking existing ductwork, if applicable.
- Assessing electrical capacity.
- Identifying suitable indoor and outdoor unit locations.
- Evaluating drainage requirements.
- Reviewing ventilation and access requirements.
This step also helps identify potential installation obstacles.
For instance, a homeowner may want the outdoor condenser installed behind a decorative fence. However, insufficient clearance around the unit can restrict airflow and make maintenance difficult.
The installer should balance appearance, noise, service access, and manufacturer clearance requirements.
Step 2: Equipment Selection and Installation Planning
Once the home’s cooling requirements are established, the contractor selects an appropriate system.
In a properly designed residential HVAC project, three important technical processes are involved:
| Standard | Purpose |
|---|---|
| ACCA Manual J | Calculates heating and cooling loads |
| ACCA Manual S | Selects appropriately sized equipment |
| ACCA Manual D | Designs residential duct systems |
These processes work together.
Manual J determines how much cooling the home needs. S helps select equipment capable of meeting that demand. Manual D determines how air should be distributed through the duct system.
Skipping one of these steps can create problems that are difficult to correct after installation.
Step 3: Preparing the Installation Area
Before mounting or connecting equipment, the installation area must be prepared.
For a split or mini-split system, preparation may include:
- Installing a suitable mounting bracket or equipment pad.
- Preparing the wall penetration for refrigerant lines and cables.
- Planning the condensate drain route.
- Checking electrical connections.
- Confirming adequate service clearance.
For central AC installations, additional preparation may involve modifying the indoor air handler location, inspecting duct connections, and preparing the condenser base.
The outdoor unit should be placed on a stable, level support with adequate clearance and consideration for drainage, snow, vegetation, and service access where relevant.
Step 4: Installing the Indoor and Outdoor Units
The next stage involves positioning and securing the main system components.
For a ductless mini-split, the indoor unit is mounted according to manufacturer requirements, with attention to airflow distribution and condensate drainage.
The outdoor condenser is positioned on an appropriate base or bracket.
For central air conditioning, the indoor evaporator coil or air handler is connected to the duct system, while the outdoor condenser is installed in the designated location.
One detail that is frequently overlooked is the relationship between indoor unit placement and everyday room use.
Installing a wall-mounted unit directly above a bed or seating area, for example, may create uncomfortable direct airflow even if the system has sufficient cooling capacity.
Step 5: Connecting Refrigerant Lines and Electrical Components
The refrigerant circuit connects the indoor and outdoor components and allows the system to transfer heat.
Depending on the equipment, the installation includes refrigerant piping, insulation, electrical wiring, communication cables, and condensate drainage.
This is a particularly important stage because poor connections or inadequate insulation can lead to refrigerant leakage, condensation, energy losses, or equipment malfunction.
Refrigerant handling and electrical work should be performed by appropriately qualified professionals in accordance with local regulations and manufacturer instructions.
For applicable systems, technicians must use the required refrigerant recovery, evacuation, charging, and leak-testing procedures.
Homeowners should not attempt to open refrigerant circuits or perform electrical connections themselves.
Step 6: Evacuation, Leak Testing, and System Charging
A newly installed split system requires proper preparation of the refrigerant circuit before commissioning.
Depending on the manufacturer’s instructions, this may involve:
- Pressure testing the refrigerant piping using an approved method.
- Checking connections for leaks.
- Evacuating the circuit with a vacuum pump.
- Verifying that the evacuation process has reached the required level and is stable.
- Charging the system according to manufacturer specifications.
Moisture and non-condensable gases inside a refrigerant circuit can interfere with heat transfer and contribute to long-term equipment damage.
Simply releasing refrigerant into the lines without carrying out the required installation procedures is not a substitute for proper evacuation and commissioning.
Step 7: Testing and Commissioning
The final installation stage is not complete when the air conditioner turns on.
A qualified technician should verify that the equipment operates within the manufacturer’s specifications.
Important checks include:
- Indoor and outdoor unit operation.
- Supply and return airflow.
- Refrigerant charge.
- Electrical measurements.
- Condensate drainage.
- Thermostat communication.
- Unusual vibration or operating noise.
- Cooling performance under appropriate operating conditions.
For central systems, airflow and external static pressure measurements can reveal restrictions in the ductwork.
For mini-split systems, the technician should verify the operation of the individual indoor units and their controls.
The homeowner should receive operating instructions, maintenance recommendations, and relevant warranty documentation.
9. How Long Does Home Air Conditioning Installation Take?
Installation time depends on system type, property conditions, equipment accessibility, and the amount of additional work required.
The following are illustrative planning estimates, not guaranteed completion times.
| System Type | Typical Installation Time |
|---|---|
| Window AC | 1–3 hours |
| Portable AC | 30–90 minutes |
| Single-zone mini-split | 4–8 hours |
| Multi-zone mini-split | 1–2 days |
| Central AC replacement with suitable existing infrastructure | 1–3 days |
| New central AC with extensive ductwork modifications | Several days or longer |
A straightforward replacement may be completed relatively quickly because the property already has suitable electrical connections, drainage, and ductwork.
A new central air conditioning installation is more complicated. Duct construction, electrical upgrades, structural modifications, or permit requirements can extend the schedule.
These estimates assume ordinary residential conditions. Difficult access, complex building layouts, and local inspection requirements can change the timeline.
10. How Much Does Home Air Conditioning Installation Cost?
The cost of home air conditioning installation depends on several variables, including equipment type, cooling capacity, labor, property size, and existing infrastructure.
There is no reliable universal installation price because labor rates, electricity requirements, building regulations, and equipment availability vary by location.
For a realistic estimate, homeowners should request an itemized quotation rather than comparing equipment prices alone.
Main Factors That Affect Installation Costs
1. Air Conditioner Type
Central systems generally require more installation work than basic window units. Ductless systems can reduce the need for duct construction but may require additional indoor units and refrigerant piping.
2. Cooling Capacity
Larger equipment can cost more, but capacity should be determined by load calculations rather than purchasing the largest available model.
3. Existing Ductwork
If existing ducts are damaged, undersized, poorly insulated, or leaking, repairs or replacement may be necessary.
4. Electrical Upgrades
Some installations require a dedicated circuit, panel modifications, disconnect switches, or other electrical work.
5. Installation Complexity
Long refrigerant line runs, difficult outdoor access, wall modifications, and complicated drainage routes can increase labor costs.
6. Permits and Inspections
Depending on the jurisdiction and project scope, mechanical, electrical, or building permits may be required.
What Should an HVAC Installation Quote Include?
Before accepting a contractor’s offer, check whether the quotation clearly identifies:
- Equipment brand, model, and capacity.
- Indoor and outdoor component specifications.
- Labor and installation materials.
- Refrigerant piping and insulation.
- Electrical work.
- Condensate drainage.
- Ductwork modifications, if applicable.
- Permits and inspection responsibilities.
- Warranty coverage.
- Testing and commissioning.
A low initial quotation is not necessarily the most economical option.
For example, one contractor may include duct sealing, electrical work, and system commissioning, while another may quote only the equipment and basic labor.
Comparing the two total prices without examining their scope can be misleading.
11. How to Choose a Professional HVAC Installation Contractor
The contractor’s experience and installation practices have a direct impact on system performance.
A reliable HVAC professional should be able to explain why a particular system was selected and how its installation will meet the home’s requirements.
Questions to Ask Before Hiring an Installer
- Will you calculate the home’s cooling load using Manual J or an accepted equivalent?
- How will you determine the correct equipment capacity?
- Will you inspect existing ductwork and electrical infrastructure?
- Are the proposed indoor and outdoor components compatible?
- Will refrigerant lines be pressure-tested and evacuated as required?
- Will you measure airflow and verify system performance?
- What installation and equipment warranties are included?
- Who is responsible for permits and required inspections?
Verify Qualifications and Documentation
Depending on your location, HVAC technicians may need specific trade licenses, refrigerant handling certifications, or electrical qualifications.
For example, in the United States, technicians handling regulated refrigerants may need EPA Section 608 certification.
Other countries have their own licensing and refrigerant-handling requirements.
Do not rely exclusively on online reviews. Ask for a written scope of work, model numbers, warranty conditions, and evidence of relevant qualifications.
12. How to Maintain Your Air Conditioner After Installation
A correctly installed system still needs regular maintenance.
Maintenance helps preserve airflow, maintain efficiency, and identify developing problems before they become expensive repairs.
Essential Maintenance Tasks
| Task | Recommended Approach |
|---|---|
| Air filter inspection | Check monthly and clean or replace as needed |
| Outdoor unit inspection | Keep the surrounding area clear |
| Condensate drain | Inspect periodically for blockages |
| Indoor coil | Have it inspected when needed |
| Electrical components | Professional inspection |
| Refrigerant circuit | Check by a qualified technician if performance problems arise |
| System performance | Review during routine HVAC maintenance |
Filter replacement intervals depend on filter type, manufacturer guidance, household conditions, pets, and system usage.
A dirty filter can restrict airflow, increasing system strain and potentially affecting cooling performance.
It is also important to keep the outdoor condenser free from leaves, debris, and vegetation that could restrict airflow.
Do not attempt to clean internal electrical components or open refrigerant connections as part of routine homeowner maintenance.
13. Common Home Air Conditioning Installation Mistakes to Avoid
Some air conditioning problems do not become obvious immediately after installation. A system may appear to work properly during the first few days, but increased outdoor temperatures can reveal issues with energy consumption, airflow, or humidity control.
Many of these problems are related to installation quality rather than the equipment itself.
Choosing an Oversized Air Conditioner
One of the most common misconceptions is that a larger air conditioner will always cool a home more effectively.
In reality, an oversized system may reach the thermostat’s target temperature too quickly and shut down before adequately removing indoor moisture.
This short cycling can reduce comfort, increase wear, and potentially increase operating costs.
How to avoid it: Request a professional cooling load calculation before selecting equipment.
Reusing Old Refrigerant Lines Without Inspection
During an air conditioner replacement, some homeowners assume that existing refrigerant lines can automatically be reused.
However, compatibility, pipe diameter, refrigerant type, cleanliness, length, and condition must all be evaluated.
Changes in refrigerant requirements may also affect the suitability of existing components.
How to avoid it: Have the contractor verify manufacturer requirements and inspect existing refrigerant piping before approving reuse.
Ignoring Return Airflow
In central air conditioning systems, supplying cool air to rooms is only part of the process. Air must also return properly to the air handler.
Restricted return airflow can increase static pressure, reduce system performance, and create uncomfortable temperature differences.
How to avoid it: Ask the contractor to inspect supply and return pathways and measure airflow and external static pressure where appropriate.
Installing the Outdoor Unit in an Unsuitable Location
Placing the condenser in an enclosed area or too close to surrounding obstacles can restrict airflow and interfere with heat rejection.
Poor placement may also increase operating noise or make maintenance difficult.
How to avoid it: Follow manufacturer clearance requirements and consider ventilation, noise, accessibility, and environmental conditions.
Overlooking Condensate Drainage
Air conditioners remove moisture from indoor air, producing condensate that must drain safely.
Incorrect drainage slope, blockages, or poorly installed drain connections can cause water leakage and damage to walls, ceilings, and floors.
How to avoid it: Have the technician test condensate drainage and inspect the system for leaks before completing the installation.
Accepting the Installation Without Performance Testing
An air conditioner turning on does not prove that it has been installed correctly.
Refrigerant charge, electrical conditions, airflow, and drainage may still be outside the manufacturer’s recommended specifications.
How to avoid it: Request commissioning measurements and confirmation that the system has been tested under appropriate operating conditions.
Important Details That Are Often Overlooked
Before approving the completed project, homeowners should confirm:
- The equipment capacity matches the calculated cooling load.
- The outdoor unit has adequate airflow clearance.
- Condensate drainage has been tested.
- Refrigerant line insulation is properly installed.
- Indoor and outdoor components are compatible.
- Return airflow has been evaluated in central systems.
- Electrical connections meet equipment requirements.
- Required leak testing and evacuation have been completed.
- System operation has been verified.
- Warranty documents and installation records have been provided.
14. Frequently Asked Questions About Home Air Conditioning Installation
How long does it take to install a home air conditioning system?
A basic single-zone mini-split installation may take approximately 4–8 hours. Central AC installation can take one to several days, depending on existing ductwork, electrical requirements, and project complexity.
What size air conditioner do I need for my home?
The correct size depends on cooling load, insulation, ceiling height, windows, climate, and other building characteristics. A professional Manual J calculation or an accepted equivalent provides a more reliable estimate than square footage alone.
Can I install a home air conditioner myself?
Portable and some window air conditioners can be installed by homeowners following manufacturer instructions. However, split systems and central AC installations typically require professional electrical and refrigerant work, subject to local regulations.
Is central air conditioning better than a mini-split system?
Neither system is universally better. Central AC is often practical for homes with suitable existing ductwork, while mini-splits offer flexible cooling without traditional ducts. The best option depends on the property layout, budget, and cooling requirements.
What should I check after air conditioner installation?
Check thermostat operation, airflow, cooling performance, condensate drainage, unusual noises, and visible installation quality. Ask the technician to verify refrigerant charge, electrical measurements, and other manufacturer-required commissioning parameters.
Does a new air conditioner need regular maintenance?
Yes. Inspect filters regularly, keep the outdoor unit clear, and arrange professional maintenance according to manufacturer recommendations. Regular maintenance helps preserve efficiency and identify potential problems early.
15. Conclusion: How to Get a Reliable Home Air Conditioning Installation
A successful home air conditioning installation involves much more than purchasing an air conditioner with the right capacity or choosing a reputable brand.
System design, equipment compatibility, installation practices, airflow distribution, and final performance testing all influence how effectively the system operates.
If you are planning to install a new air conditioning system, follow these steps:
- Evaluate your home’s layout and cooling requirements.
- Compare central AC and ductless mini-split systems based on your property’s structure.
- Ask an HVAC contractor to determine the appropriate equipment capacity through professional load calculations.
- Request a detailed quotation covering equipment, labor, electrical work, ductwork, and additional installation requirements.
- Hire a qualified professional to complete the installation.
- Review commissioning results and system performance before accepting the completed project.
What should you do next?
Before requesting installation estimates, identify the approximate conditioned floor area, number of rooms, insulation condition, and whether your home already has ductwork.
Then request written proposals from at least two qualified HVAC contractors using comparable technical specifications.
This makes it easier to evaluate the actual quality of the proposed work instead of comparing installation prices alone.
A properly designed and professionally installed air conditioning system should provide reliable cooling, consistent indoor comfort, and efficient operation for years to come.